Want to streamline your Chromebook experience, avoid those annoying accidental touches, or simply prefer a traditional laptop feel? You're in the right place. This Step-by-Step Guide to Disabling Your Chromebook Touchscreen will walk you through multiple straightforward methods, ensuring you regain full control over your device, easily and confidently.
Whether you're battling phantom touches, working in a dusty environment, or just want to boost your focus, taking a moment to disable your Chromebook's touchscreen can make a surprising difference. Let's dive in.
At a Glance: Quick Takes on Disabling Your Touchscreen
- Keyboard Shortcut (Shift + Search + T): The fastest way to toggle your touchscreen on/off, often temporary.
- System Settings: A permanent solution found in "Device" > "Displays" or "Accessibility."
- Chrome Flags: Necessary for some to enable the keyboard shortcut if it's not working.
- Command Line (Advanced): For users in Developer Mode seeking granular control.
- Chrome Extensions: A browser-based solution, though less integrated.
- Re-enable Easily: All methods have a straightforward reversal process.
Why Go Touch-Free? Understanding the Benefits
Chromebooks with touchscreens offer incredible versatility, blending tablet-like interaction with laptop productivity. However, there are plenty of scenarios where that touch functionality becomes more of a hindrance than a help. Perhaps you're constantly leaning over your keyboard, accidentally triggering actions. Maybe you're using an external monitor setup, making the built-in screen's touch redundant. Or perhaps, like many, you simply prefer the precision of a mouse or touchpad for certain tasks.
Disabling the touchscreen can lead to:
- Reduced Accidental Input: No more phantom clicks, unintended scrolls, or opened apps when you rest your hand near the screen.
- Improved Focus: Removing a layer of interaction can help some users concentrate better, especially when working on detailed tasks.
- Enhanced Productivity: For many, the muscle memory of a keyboard and mouse/trackpad combination is simply faster for prolonged work sessions.
- Specific Use Cases: If you're using your Chromebook primarily as a desktop replacement with an external display, or you prefer a stylus for certain inputs, disabling direct touch can clean up your workflow.
Whatever your reason, taking control of your Chromebook's input methods is about tailoring your device to your personal preferences and optimizing your experience.
The Quickest Fix: Keyboard Shortcut for Instant Control
For most users, the quickest and easiest way to disable (and re-enable) your Chromebook's touchscreen is with a simple keyboard shortcut. Think of it as an on-the-fly toggle switch.
How It Works: Shift + Search + T
- Locate the Keys: Find the Shift key (usually two, pick either), the Search key (it has a magnifying glass icon, often where Caps Lock is on traditional keyboards), and the T key.
- Press Simultaneously: Hold down Shift + Search + T all at once.
- Observe the Change: You won't get a pop-up confirmation, but you should immediately notice that your touchscreen no longer responds to input.
- To Re-enable: Simply press Shift + Search + T again, and your touchscreen functionality will return.
This method is fantastic for temporary changes, like when you're settling in for a long typing session or connecting to an external display.
Troubleshooting the Shortcut: Enabling Debug Flags
If the Shift + Search + T shortcut isn't working for you right out of the box, don't fret. Your Chromebook might need a little nudge to enable its "Debugging Keyboard Shortcuts." This is a quick fix within Chrome Flags.
- Open Chrome: Launch your Chrome browser on your Chromebook.
- Navigate to Chrome Flags: In the address bar, type
chrome://flags/#ash-debug-shortcutsand press Enter. - Find the Flag: Look for the "Debugging Keyboard Shortcuts" option.
- Enable It: From the dropdown menu next to it, select "Enabled."
- Restart Your Chromebook: A "Restart" button will appear at the bottom right. Click it to reboot your device.
- Try the Shortcut Again: Once your Chromebook restarts, the Shift + Search + T shortcut should now work as intended.
Remember, Chrome Flags are experimental features, but enabling this specific flag for debugging shortcuts is a widely accepted and safe step for touchscreen control.
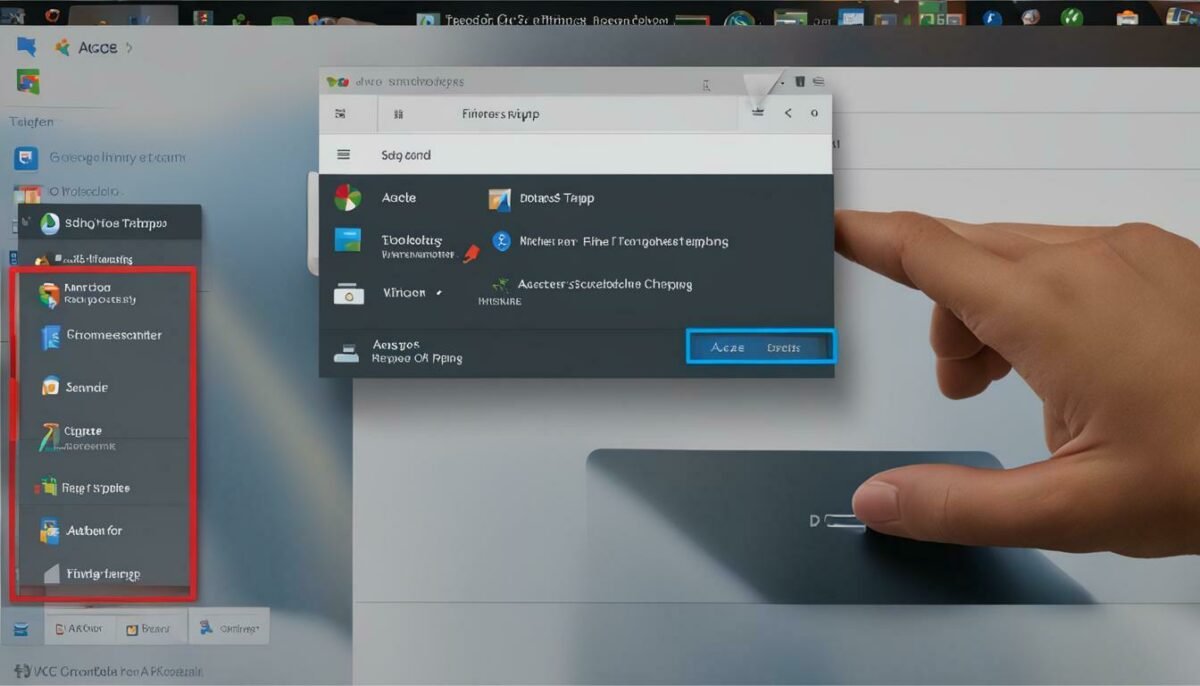
The Standard Approach: Through Your Chromebook's Settings
For a more persistent or system-wide disable, your Chromebook's built-in Settings app offers a couple of straightforward routes. These methods are generally preferred if you want your touchscreen to remain off even after a restart.
Method 1: Device Display Settings
This is often the most direct and intuitive way to disable the touchscreen permanently through the user interface.
- Access Settings: Click on the status area in the bottom-right corner of your screen (where the time, Wi-Fi, and battery icons are).
- Open Settings: Click the gear icon to open your Chromebook's Settings.
- Navigate to Device: In the left-hand menu, scroll down and click on "Device."
- Select Displays: Under the "Device" section, choose "Displays."
- Toggle Touchscreen: You should see an option labeled "Enable Touchscreen." Toggle the switch to the off position.
- Confirmation: The change is immediate. To re-enable, simply toggle the switch back on.
This method is robust and ensures the touchscreen remains off until you manually re-enable it.
Method 2: Accessibility Settings
Another path to disable your touchscreen lies within the accessibility features, which are designed to customize your device for various needs. This offers another layer of control for users who want to explore Chromebook's robust accessibility features.
- Open Settings: Again, click the status area (bottom-right) and then the gear icon to open Settings.
- Scroll to Advanced: In the left-hand menu, scroll down and click on "Advanced."
- Select Accessibility: Under "Advanced," click on "Accessibility," then click "Manage accessibility features."
- Find Mouse and Touchpad: Scroll down until you find the "Mouse and touchpad" section.
- Disable Touchscreen: Here, you'll find the "Enable Touchscreen" option. Toggle this switch to the off position.
- Instant Change: The touchscreen will immediately stop responding. Toggle it back on if you wish to re-enable it.
Both the Display Settings and Accessibility Settings methods provide a reliable way to disable your touchscreen through the graphical user interface, making them accessible to almost any user.
Advanced Control: Disabling Via the Command Line (Developer Mode)
For those who crave deeper control and are comfortable venturing into the more technical side of their Chromebook, disabling the touchscreen via the command line offers a robust solution. This method requires your Chromebook to be in Developer Mode.
Warning: Developer Mode Considerations
Enabling Developer Mode on your Chromebook grants you more system-level access but comes with a few caveats:
- Security Risk: It reduces some of Chrome OS's built-in security features, as it allows for unsigned code to run.
- Data Wipe: The initial switch to Developer Mode will factory reset your Chromebook, erasing all local data. Back up anything important!
- "OS verification is OFF" Screen: Each time you boot up, you'll see a warning screen. You can either press Ctrl + D to continue booting or let the timer run out.
If you're not already in Developer Mode and these warnings give you pause, consider sticking to the Settings or Keyboard Shortcut methods. For those ready, you can find a guide on enabling Developer Mode on your Chromebook if you haven't done so already.
Step-by-Step with Crosh
Once you're in Developer Mode:
- Open Crosh Terminal: Press Ctrl + Alt + T simultaneously. This will open the Crosh terminal, a command-line interface within Chrome OS.
- Enter Shell: In the Crosh window, type
shelland press Enter. This will give you access to a more powerful command-line environment. - List Input Devices: To identify your touchscreen device, type
xinput listand press Enter. You'll see a list of input devices. Look for an entry that clearly indicates "touchscreen" or "touch panel" and note its ID number. It might look something likeELAN Touchscreen id=X, whereXis the ID. - Disable the Device: Once you have the device ID, use the following command to disable it:
xinput set-prop [device-id] "Device Enabled" 0
Replace[device-id]with the actual ID number you noted in the previous step. For example, if your touchscreen ID was12, the command would bexinput set-prop 12 "Device Enabled" 0. - Verify (Optional): You can run
xinput listagain to see if the device now shows as "disabled" or "Device Enabled (X): 0". - Reboot (Recommended): To ensure the changes are fully applied and persistent, it's a good idea to reboot your Chromebook.
To Re-enable the Touchscreen via Command Line:
Follow steps 1-3 to get the device ID, then use this command:xinput set-prop [device-id] "Device Enabled" 1
This method gives you the most precise control over individual input devices, making it a powerful tool for advanced users.
Exploring Chrome Browser Extensions
While not a direct system-level solution, Chrome extensions can offer another way to manage touchscreen input, especially if you're looking for a browser-centric approach. These extensions work within the Chrome browser environment. You might consider this option if other methods seem too technical or don't quite fit your workflow. For overall managing your Chrome extensions efficiently, make sure to keep your extension list lean.
Finding and Using Extensions
- Open Chrome Browser: On your Chromebook, launch the Chrome browser.
- Access Extensions Menu: Click the three vertical dots (More menu) in the top-right corner.
- Go to Extensions: Select "More tools" > "Extensions."
- Open Web Store: At the bottom left, click "Open Chrome Web Store."
- Search: In the Web Store search bar, type "disable touchscreen" or "no touch screen."
- Add to Chrome: Browse the results. When you find an extension that looks promising (check ratings and reviews!), click "Add to Chrome."
- Manage Extension: Once added, the extension will usually appear as an icon in your browser's toolbar. Click it to activate or deactivate the touchscreen functionality it provides.
A Word of Caution on Extensions
- Limited Scope: Extensions primarily affect interaction within the browser or applications running within the Chrome OS environment, and may not always provide a complete system-wide disable for all gestures or contexts.
- Security & Privacy: Always be mindful of the permissions requested by extensions. Only install extensions from reputable developers with good reviews to protect your data and privacy.
- Performance Impact: Too many extensions can sometimes slow down your browser or Chromebook.
For a true system-level disable, the methods via Settings or Keyboard Shortcut are generally more effective and recommended.
Bringing It Back: Re-enabling Your Touchscreen
Just as important as knowing how to turn off your touchscreen is knowing how to turn it back on. The good news is that reversing any of the methods we've discussed is just as simple.
- Keyboard Shortcut: Press Shift + Search + T again.
- System Settings (Device > Displays): Go back to Settings > Device > Displays and toggle "Enable Touchscreen" back to the on position.
- Accessibility Settings: Navigate to Settings > Advanced > Accessibility > Manage accessibility features > Mouse and touchpad, and toggle "Enable Touchscreen" back to on.
- Chrome Flags: Go to
chrome://flags/#ash-debug-shortcuts, select "Default" or "Disabled" from the dropdown, and restart. - Command Line: Open Crosh (Ctrl + Alt + T), type
shell, find your touchscreen's device ID withxinput list, then usexinput set-prop [device-id] "Device Enabled" 1, and reboot. - Chrome Extensions: Click the extension icon in your browser toolbar to toggle it off, or remove the extension from
chrome://extensions.
You'll find that your touchscreen responsiveness returns immediately once re-enabled by any of these methods.
Beyond Disabling: Customizing Your Touch Experience
Even if you primarily use your keyboard and touchpad, your Chromebook offers various settings to customize the overall touch experience, including how your touchpad behaves. While we're focusing on disabling the touchscreen itself, these related settings can further help in optimizing your Chromebook for productivity and preventing accidental inputs from other sources. You can access these via Settings > Device.
Touchpad Sensitivity & Tap-to-Click
- Touchpad Sensitivity: Adjusts how responsive your touchpad is to your finger movements. A lower sensitivity can prevent overshooting or accidental selections.
- Tap-to-Click: Enables you to tap the touchpad to perform a click, rather than physically pressing it down. Some users prefer this for speed, while others disable it to avoid unintentional clicks.
Palm Detection and Cursor Speed
- Palm Detection: This crucial setting helps prevent accidental clicks or cursor movements when your palm inadvertently rests on the touchpad while typing. Ensure this is enabled for a smoother typing experience.
- Cursor Speed: Adjusts how quickly your mouse cursor moves across the screen in response to touchpad movements. Fine-tuning this can make a big difference in precision and comfort.
Display Magnification & Screen Rotation
- Display Magnification: While not directly about input, this feature allows you to zoom in on your screen content, often using pinch gestures on the touchpad (if enabled). If you're looking to minimize touch interaction, you might manage how this is triggered.
- Screen Rotation: On convertible Chromebooks, this setting controls whether the screen automatically rotates when you change the device's orientation. While less about disabling touch, it's part of the adaptive "device" experience.
Familiarizing yourself with these settings allows you to fine-tune your Chromebook for your ideal workflow, whether that includes touch, touchpad, or external mouse input.
Troubleshooting: When Your Touchscreen Isn't Behaving
Sometimes, a touchscreen might seem "disabled" because it's simply not working correctly. If you've tried to re-enable it and it's still unresponsive, or if it's acting erratically, these troubleshooting steps might help.
Check for Updates
Outdated software can lead to all sorts of quirks. Ensuring your Chromebook is running the latest version of Chrome OS is always a good first step for any technical issue.
- Open Settings: Click the status area (bottom-right) > Gear icon.
- Go to About Chrome OS: In the left-hand menu, scroll down to "About Chrome OS."
- Check for Updates: Click "Check for updates." If an update is available, follow the prompts to download and install it, then restart your Chromebook.
A Simple Reboot
The classic fix! A full power cycle can resolve many temporary software glitches by clearing out any transient errors.
- Power Down: Press and hold the power button for about ten seconds until your Chromebook completely turns off.
- Power On: Press the power button again to restart your device.
- Test: Once it boots up, check if your touchscreen is working normally.
Clean Your Screen
It might sound too simple, but dirt, smudges, or debris on your touchscreen can interfere with its responsiveness.
- Power Off: Turn off your Chromebook.
- Clean Carefully: Use a soft, lint-free microfiber cloth, perhaps slightly dampened with water (or a screen-safe cleaner), to gently wipe down the screen. Avoid harsh chemicals.
- Power On and Test: Restart your Chromebook and test the touchscreen.
When All Else Fails: Contact Support
If you've exhausted all these steps and your touchscreen still isn't working as it should, it might indicate a hardware issue. In this case, contacting Chromebook support (either the device manufacturer or Google) would be your next best step for further diagnosis and potential repair.
Optimizing Your Workflow: Tips for a Touch-Free Chromebook
Once you've disabled your touchscreen, you might find yourself adapting to a new way of interacting with your Chromebook. Here are some tips to make that transition smooth and efficient:
- Master the Touchpad: Take time to fully utilize your Chromebook's touchpad. Learn multi-finger gestures like two-finger scroll, three-finger swipe for switching tabs, and pinch-to-zoom (if desired).
- Embrace Keyboard Shortcuts: Chrome OS is rich with keyboard shortcuts. Learning commands like Ctrl + W (close tab), Alt + Tab (switch apps), or Ctrl + Search (launch apps) can significantly speed up your workflow.
- Consider a Mouse: For extended desktop use or precise work, an external USB or Bluetooth mouse can offer superior control and comfort compared to a touchpad.
- Explore Voice Commands: Google Assistant is integrated into Chrome OS. You can use voice commands for tasks like opening apps, searching the web, or setting reminders, providing another hands-free input method.
- Customize Display Settings: If you often connect external monitors, get comfortable with the display settings (found in the status area > Settings > Device > Displays) to arrange screens, adjust resolution, and manage mirroring or extension.
- Always Know How to Re-enable: Keep the Shift + Search + T shortcut or the Settings path in mind, just in case you ever need to quickly bring your touchscreen back online for a specific task or to let someone else use your device.
By leveraging these alternative input methods, you can enjoy a highly productive and efficient Chromebook experience even without direct screen interaction.
Frequently Asked Questions (FAQs) About Chromebook Touchscreens
Q: Is disabling the touchscreen permanent?
A: Not unless you make it so! The keyboard shortcut (Shift + Search + T) is temporary and easily toggled. Disabling via System Settings is persistent across reboots until you manually re-enable it. Command line changes are also persistent but easily reversible.
Q: Does disabling the touchscreen save battery life?
A: Theoretically, yes, by a very small margin. The touchscreen digitizer and related components consume a tiny amount of power. However, the impact on overall battery life is usually negligible and not a primary reason to disable it. You'll likely see far greater battery savings from adjusting screen brightness or closing unused tabs.
Q: Can I use an external monitor with the touchscreen disabled?
A: Absolutely! Disabling the built-in touchscreen only affects that specific input method on your Chromebook's primary display. Any external monitors will function as usual, and you can still use your touchpad or an external mouse to control the cursor across all connected screens.
Q: Will this affect my Chromebook's performance?
A: No, disabling the touchscreen will not negatively affect your Chromebook's overall performance. If anything, it might slightly improve system responsiveness by reducing background input processing, but any difference would be imperceptible to most users.
Your Chromebook, Your Rules: Final Thoughts
Whether you're looking to minimize accidental inputs, prefer the tactile feedback of a keyboard and mouse, or simply want to fine-tune your device for a specific workflow, taking control of your Chromebook's touchscreen functionality is a straightforward process. From quick keyboard shortcuts to deeper system settings, you have multiple options at your disposal.
Experiment with these methods to find the one that best suits your needs, and remember that re-enabling your touchscreen is always just as easy as turning it off. Your Chromebook is a versatile tool; configure it to work precisely the way you do.
Untuk pemahaman lebih lengkap, baca panduan utama kami: How to disable Chromebook touch